What's new
  • Please do not post any links until you have 3 posts as they will automatically be rejected to prevent SPAM. Many words are also blocked due to being used in SPAM Messages. Thanks!

3D Printer Essentials? (Or maybe better named as "Adventures in Newb 3D Printing" )

sswilson

Moderator
Staff member
Joined
Dec 9, 2006
Messages
24,725
Location
Moncton NB
I got mine from spool3d . They are listed as an official retailer. Lots of fake ones for sure.
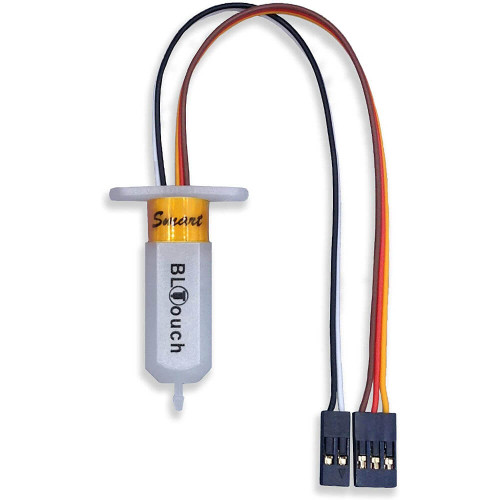


Cool!

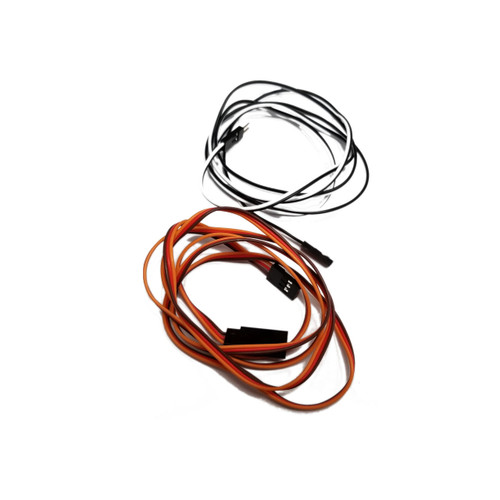
The cable in the link is only 15CM though so I'm assuming buying this kit which already includes the longer cable for Creality printers would be the best choice... https://spool3d.ca/creality-bltouch-auto-bed-level-kit/

But then the question would be v1 or v2 board version for the new board I ordered..... ? (I'd guess V2...)

Or, would I be better off buying the one you linked to originally and throwing in a 2000mm extension cable?
 

Entz

Well-known member
Joined
Jul 17, 2011
Messages
1,878
Location
Kelowna
I am sure you can print a bracket if yours doesn’t have one already. One comment says the kit didn’t work on an ender 3 so I would be somewhat apprehensive with that route.

my printer had the bracket and the bltouch connected to a dedicated spot on the breakout board on the hot end carrier so I have no idea what extension if any is required 🙈

edit: wtf is a somrehab lol
 
Last edited:

sswilson

Moderator
Staff member
Joined
Dec 9, 2006
Messages
24,725
Location
Moncton NB
Looks like you will need a 1000mm extension. https://3dprintingcanada.com/blogs/news/how-to-install-the-bl-touch-on-a-creality-ender-3


yeah, definitely get the extension cables, i decided to make my own when i did the bltouch mod and it was a pain in the arse.

That's the way I'll go when the time comes then (and it may end up being sooner rather than later, but I'm at least going to wait for my new mainboard to get here on the slow boat, and that hasn't even shipped yet so it's probably a couple of months out. :( ).

I shouldn't need a mount, there's an add-on for the "fang" that'll mount either left or right, and now that I'm thinking of it, I'd want it on the far side (PSU side) so that it's not conflicting with my camera mount.

The Petsfang Duct is a satisfying print as well... not a lot of support, but the two pieces are pretty complex and look/feel like a substantial print.
 

lcdguy

Well-known member
Folding Team
Joined
Mar 17, 2007
Messages
2,335
Location
An undisclosed location
i think this is the mount i used, can't remember though it was a while ago.


sswilson

Moderator
Staff member
Joined
Dec 9, 2006
Messages
24,725
Location
Moncton NB
Heh... nut inserts are my bane..... :)

Back to the calibration......

edit: Or is it pretty common to have to file down the insert holes to get the nut in without cracking the build?
 
Last edited:

lowfat

Moderator
Staff member
Joined
Feb 12, 2007
Messages
12,846
Location
Grande Prairie, AB
Heh... nut inserts are my bane..... :)

Back to the calibration......

edit: Or is it pretty common to have to file down the insert holes to get the nut in without cracking the build?

If it was designed well, most holes should be oversized by about 0.3mm.

Like SugarJ says, try using heat. I always thread my nuts / brass inserts on to a long screw, then heat it w/ a torch for a few seconds.
 

sswilson

Moderator
Staff member
Joined
Dec 9, 2006
Messages
24,725
Location
Moncton NB
Sounds good. I'm still working on my calibration so it's possible that I was out enough that it added up to enough to make it too small.

I recalibrated the "Z" axis (X & Y are within .03 on the 20mm cube) and will try heating it up and/or filing down the walls enough to make sure it's going to fit before I try to force it again.
 
Top