Spblue
Well-known member
Hello all! I just finished my watercooling build last week-end and I figured I'd post a mini-worklog. It's nothing special, considering some of the awesome stuff people are doing in here but here goes...
I borrowed a friend's camera to take some pics and I suck at taking pics, so I apologize if some of them are on the blurry side.
System Components
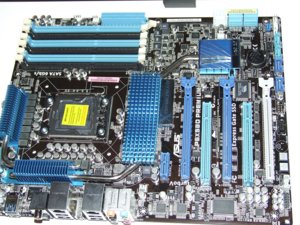
Motherboard : Asus P6X58D Premium (SATA 6Gb/s & USB 3.0)
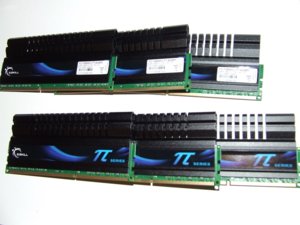
RAM : 6x G. Skill 1600Mhz 7-8-7-24 @ 1.5V
CPU : Intel Xeon W3540
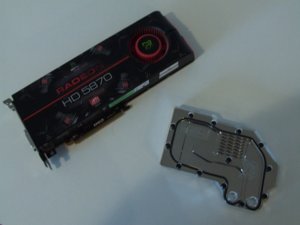
GPU : XFX ATi 5870
Case : Corsair Obsidian 800D
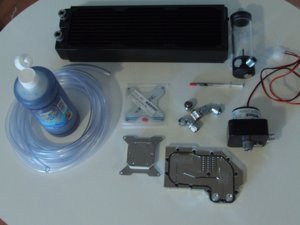
Watercooling (Huge thanks to Dazmode for awesome prices and taking the time to help a noob out!)
CPU block : Nickel-plated Heatkiller 3.0
GPU block : EK 5870 waterblock
Radiator : TFC Xchanger 360
Reservoir : EK 150
Pump : MCP 655 (With EK Top)
Tubing : Clear Feser 3/8" ID 1/2" OD
Fluid : Feser One Blue
Feser compressiong fittings
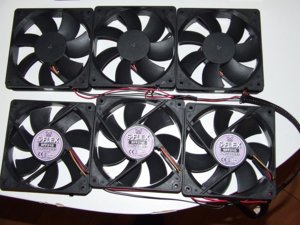
6x Scythe S-FLEX SFF21G 120mm Fans
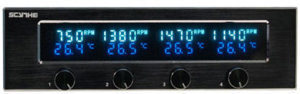
Scythe KM02-BK Fan Controller
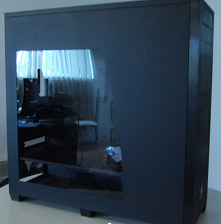
Obsidian 800D:

All the watercooling components gathered. I bought almost everything from DazMode. I highly recommend buying from him for all your watercooling needs.

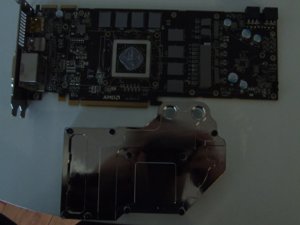
First, I installed the EK GPU block on my XFX 5870. The EK block was very impressive, the finish was mirror perfect.


Next, I took 6 Scythe S-FLEX fans and I daisy chained them in two pack of three fans. This allows me to control all 6 fans using only 2 channels of the fan controller. The Scythe fans aren't very power hungry: they need only 2.88 watts each, so even 3 of them on a single channel isn't near the 20W per channel limit of the Scythe fan controller.


After I mounted the fans on the radiator, and mounted the radiator + fans inside the case, all that was left was to install the motherboard, RAM and cpu.


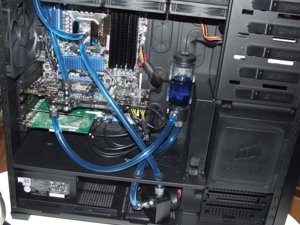
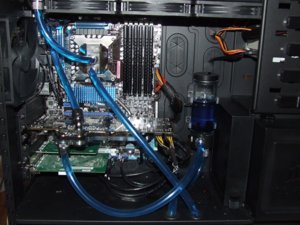
Here are some pics of the completed system:


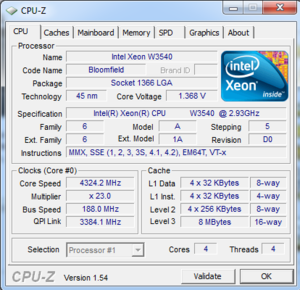
There we go! For my first watercooling build, it didn't go too badly. I had a leak on my reservoir when I first filled the loop, but some manual tightening fixed it. After that everything was smooth and I was able to get some overclocking done! I wasn't quite able to reach 4.4Ghz stable, unfortunately. At least I got somewhat close :

That voltage is pretty much as high as I'm willing to go for a 24/7 overclock. Even with 6 fans in push/pull on my 360 Xchanger, the CPU still reaches 80C with linpack. It doesn't even get to 70C with Prime95 though, so everything should be good. All in all, that was a fun experiment. I might try getting a 6 cores to put in there when they get a little bit more affordable...
Hum, how do I upload pics without them showing again as attachments?h34r:
I borrowed a friend's camera to take some pics and I suck at taking pics, so I apologize if some of them are on the blurry side.
System Components
Motherboard : Asus P6X58D Premium (SATA 6Gb/s & USB 3.0)
RAM : 6x G. Skill 1600Mhz 7-8-7-24 @ 1.5V
CPU : Intel Xeon W3540
GPU : XFX ATi 5870
Case : Corsair Obsidian 800D
Watercooling (Huge thanks to Dazmode for awesome prices and taking the time to help a noob out!)
CPU block : Nickel-plated Heatkiller 3.0
GPU block : EK 5870 waterblock
Radiator : TFC Xchanger 360
Reservoir : EK 150
Pump : MCP 655 (With EK Top)
Tubing : Clear Feser 3/8" ID 1/2" OD
Fluid : Feser One Blue
Feser compressiong fittings
6x Scythe S-FLEX SFF21G 120mm Fans
Scythe KM02-BK Fan Controller
Obsidian 800D:
All the watercooling components gathered. I bought almost everything from DazMode. I highly recommend buying from him for all your watercooling needs.
First, I installed the EK GPU block on my XFX 5870. The EK block was very impressive, the finish was mirror perfect.
Next, I took 6 Scythe S-FLEX fans and I daisy chained them in two pack of three fans. This allows me to control all 6 fans using only 2 channels of the fan controller. The Scythe fans aren't very power hungry: they need only 2.88 watts each, so even 3 of them on a single channel isn't near the 20W per channel limit of the Scythe fan controller.
After I mounted the fans on the radiator, and mounted the radiator + fans inside the case, all that was left was to install the motherboard, RAM and cpu.
Here are some pics of the completed system:
There we go! For my first watercooling build, it didn't go too badly. I had a leak on my reservoir when I first filled the loop, but some manual tightening fixed it. After that everything was smooth and I was able to get some overclocking done! I wasn't quite able to reach 4.4Ghz stable, unfortunately. At least I got somewhat close :
That voltage is pretty much as high as I'm willing to go for a 24/7 overclock. Even with 6 fans in push/pull on my 360 Xchanger, the CPU still reaches 80C with linpack. It doesn't even get to 70C with Prime95 though, so everything should be good. All in all, that was a fun experiment. I might try getting a 6 cores to put in there when they get a little bit more affordable...
Hum, how do I upload pics without them showing again as attachments?
h34r:Attachments
-
 Obsidian.png113.3 KB · Views: 4,085
 -
 vid & waterblock.jpg132.5 KB · Views: 4,126
 -
 watercool.jpg143.6 KB · Views: 4,277
 -
 gpu-installed.jpg152.4 KB · Views: 4,202
 -
 gpu-preinstall.jpg155.1 KB · Views: 4,015
 -
 RAM.jpg133.7 KB · Views: 3,999
 -
 motherboard.jpg323.1 KB · Views: 4,231
 -
 fans.jpg213.3 KB · Views: 4,120
 -
 completed1.jpg250.3 KB · Views: 21,463
 -
 completed2.jpg213.7 KB · Views: 6,950
 -
 FANSCK2BK_m.jpg13.2 KB · Views: 2,198
 -
 cpuz.png43.4 KB · Views: 3,994