FYI, this project lives again. It was gathering dust, since I decided to move my GF into my place, and apparently women come with loads of stuff, so my stuff got put on the back burner. Good thing she's worth it.

Now that she had to fly out of province to look after her Mom (knee replacement), I have time to put some cycles into this thing over the holidays.
I dusted it off, and am now in the middle of wiring it up. It's half-done I'd say. It took a day or two to refresh my memory on where I'd left off, and I hit some issues. Not with the LDO kit, that's brilliant, but more due to my own stupid idea to use the latest Stealthburner toolhead, instead of the Afterburner kit you're supposed to use. Now that idea isn't exactly stupid, but I failed to print the proper parts (D'OH!), not accounting for the tool-head breakout PCB. Also since I shelved this thing, the design was updated too. Not sure if I'm going to go direct to the new design, since I already have the bloody tool-head built, or just print the extra parts I need for the PCB. I'm not doing the Neopixel LEDs in the SB shroud (yet), so I might just try to use as much as I have now, and print the new shroud when I get the LEDs later.
Stuff I got done:
1) wire up the steppers, main voltage, Pi power, cable manage that stuff ;
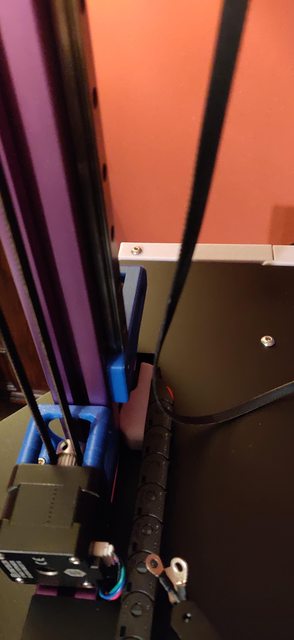
2) started wiring the bed, connected the Y-axis cable chain / wires (required a newer part to avoid colliding with the stepper motor plug);
I used to think this black PCB with red lettering was cool. Now I hate it, since you can't read the bloody text in anything other than perfect sunlight, or by using a magnifying glass. WHITE lettering would have been much more practical!
Somehow forgot to print this anchor for the Z-chain, D'OH, fixed:
Got the wiring run for the bed, and installed the Y-chain:
Also got the bed thermistor installed:
New part needed to be printed for the Y-chain to avoid collision with the stepper motor cable (and yes, I do believe it's installed backwards, but it doesn't seem to care):
The plan is now:
1) print proper parts for SB so I can start wiring up the tool head;
2) finish wiring up the under-belly;
3) wire up the heated bed;
4) install the X/Z cable chains to complete the cabling;
5) pray to God / Buddha / Satan / Santa / Flying Spaghetti Monster that nothing fries on power up;
Oh and figure out how to install Klipper / Mainsail on this thing. I haven't even LOOKED at that yet, LOL! More to come soon.